
 Well, Christmas day may have passed, but I still have more cards to share with you. This one was really simple. The gingerbread man comes from the Winter Frolic cartridge and was cut at 5 inches. I did consider cutting up one of his legs to look like someone had taken a bite out of him....maybe i'll do that with my next gingerbread man!
Sunday, December 26, 2010
Merry Christmas - Day 6
Well, Christmas day may have passed, but I still have more cards to share with you. This one was really simple. The gingerbread man comes from the Winter Frolic cartridge and was cut at 5 inches. I did consider cutting up one of his legs to look like someone had taken a bite out of him....maybe i'll do that with my next gingerbread man!Saturday, December 25, 2010
Merry Christmas - Day 5
 MERRY MERRY CHRISTMAS!!!
I hope everyone has had a fabulous morning with their family/friends. It is a relaxing morning for my husband and I. We are celebrating with his family later tonight and my family tomorrow. So for now, it is a wonderfully relaxing Christmas morning.
This is my favorite Christmas card that I've made so far. When I first saw this little mouse I was unsure if I would ever use him. But my sister thought he was the cutest thing ever...so I gave him a try. He is cut at 3 1/2 inches with gray flocking on his body and a little bead for his eye. The different textures really make the card. OH and the paper! The fun background works really well for this simple mouse.
To finish it off I trimmed the photo-holder edge with silver Stickles and stamped another sentiment from Pink Cricut's Christmas set.
Have a wonderful Christmas everyone!!!
Friday, December 24, 2010
Merry Christmas - Day 4
 It's Christmas Eve! Did you get all of your Christmas shopping done? Are all of your cards made? I still have a little bit of both left to do! Luckily I have all day today to get things done!
Here is another Christmas card I made this year. If you've seen my previous posts this week I'm sure you'll recognize that the cartridge again is Winter Frolic. I cut it at 4 inches. The textured and shiny paper work so well for this cute ice skater. And the background swirly paper is PERFECT!
The sentiment "Mix, Mingle and be Merry" is a fun stamp from Pink Stamper.
I hope everyone has a fabulous Christmas Eve. I'll have another card on Christmas morning!
Thursday, December 23, 2010
Merry Christmas - Day 3

Good Morning! Here is my third Christmas card. Again the image is from Winter Frolic and the stamp is from the Pink Cricut Christmas collection. There was a question on one of the past post about where I got the frame cards...they came from Paper Source and I love them!
I stole the idea for the hanging ornaments from another blogger. The silver paper that I used on it looks really cool!
Thanks for stopping by...more to come over the next few days!
Wednesday, December 22, 2010
Merry Christmas - Day 2
 Welcome to my second Christmas Card post for the week. If you have just come over from this weeks Cooking with Cricut challenge...welcome!
 This weeks challenge was to create a project that celebrates The Real Meaning of Christmas. The image is from Winter Frolic cut at 4 inches. Other than the small eyes and mouth, this was a really easy image to put together. I placed it on a piece of crackled red 4 x 6 paper that I picked up at Hobby Lobby this week. At the bottom of the card is Pink Cricut's stamp that simply states "Come let us Adore Him". I really love how the photo-frame card is working for my Christmas cards!
Stop by and participate in this weeks challenge at Cooking With Cricut!
Tuesday, December 21, 2010
Merry Christmas - Day 1
 Hello Everyone! I hope everyone is getting excited for Christmas. I finally got around to making a set of Christmas cards for my co-workers. I'll be featuring a new card each day this week leading up to Christmas.
I picked up these photo-holding cards from Paper Source when I was in Chicago earlier this year. I thought it would be a great frame for some of the cards I made. All of the cards I feature use stamps from Pink Cricut and images from the Winter Frolic cartridge.
This first one is Snowman 5 cut at 5 inches. I really like the use of the purple...he still looks like a cool dude without being too Christmas-y! To highlight the frame of the card I used a marker to dot along the edge.
This guy is really cute :)
 On the inside of all of the cards I used this stamp from Pink Cricut that has a cute saying "Wishing you Sparkle, Wishing you Cheer, For a Bright and Merry Christmas and a Happy New Year".
 Check back every day this week to see what other cards I came up with (including a one for Wednesday's new Cooking With Cricut challenge)!
Thursday, December 16, 2010
Stocking Gift Box
 First of all I have to apologize for how late this post is! I had my final exam last night so I feel like I can actually breath and do something besides work, study and sleep.
For this weeks Cooking With Cricut challenge we are making Stockings & Stuffers! I created a cute little gift box that could hold candy or small little trinkets that is in the shape of a stocking. The stocking comes from the Winter Frolic cartridge.
First I cut two of the shadows out. Then I cut out the first set of the stocking and it's layers. Finally, I cut out a second set of the stocking and it's layers FLIPPED.
For the box I didn't do anything to fancy. I just measured the inside part of the stocking and made a box that would fit those dimensions.
The patterned paper comes from Stampin' Up. The rest of it is just pieces that I had laying around. To make the gifts look a little cooler than regular solid paper I used a Stampin' Up ink marker to doodle the snowflakes on the blue package, dots on the ribbons and color in the green dots. This was a really simple project that didn't take a lot of thinking or planning.
Be sure to join us on Cooking With Cricut for this weeks challenge AND the 25 days of Christmas which is full of projects and free files!
Tuesday, December 7, 2010
Pop-Up Birthday
 My little sister turned 21 this year and she asked for a pop-up card. I was a little intimidated at first, but when I found out how it works....boy is it easy!
Seriously, all you need is an image that you want to pop-out and a strip of cardstock about .5 x 2.5 inches. Score the strip every .5 inches and fold it into a square. Attach the square to the image and then the top and bottom of the card.
The one thing I learned was to consider your image when you decide how big to make the strip of cardstock. As you may be able to see in the picture to the right, my pop-up strip was bigger than the lower part of the numbers so you could see it. Also, if you are using a bigger pop-up item,
 you may want a bigger strip or even two strips. I can't recall what cartridge the images all came from. But I really like how the numbers look like birthday candles. On the front of the card, I did my best to combine fun with sophistication. The only thing I think I did wrong was that I over did the sparkle spritz on the cake.
Thanks for checking it out...really, you should try it yourself!
Monday, December 6, 2010
Christmas Card Winner
Well, it officially feels like the holiday season. The snow is falling heavily and I'm giving things away! Now we just need to put up the decorations.
The lucky winner of the Christmas Card Cartridge is ... Lynne! I will be emailing you shortly for your address.
Congrats!
Friday, December 3, 2010
Follower Giveaway

Is everyone getting ready for the Christmas season? I feel so behind as I haven't made many Christmas cards and it is my favorite holiday! A little while back I mentioned that I would have a giveaway to my followers to celebrate reaching 50 followers. Well, after a few blog hops we blew that number away and I have now reached over 100 followers!
I am so grateful for all of you. I really hope that my postings inspire you to try a new technique or use something a little differently.
As a thank you, I am giving away the Christmas Card cartridge. This cartridge has some really cool card shapes that can be used all year long.
To be entered in the drawing:
1) Be or become a follower.
2) Leave a comment on this post by 8am Monday Dec 5th Eastern that includes a way for me to contact you.
1) Be or become a follower.
2) Leave a comment on this post by 8am Monday Dec 5th Eastern that includes a way for me to contact you.
I will be using random.org to select the winner.
Tuesday, November 30, 2010
ThankYou Money Card

In a few weeks my husband and I are getting on a boat and going on vacation! I'm so excited for it. I really need this vacation. Even planning this vacation has been stressful (we were supposed to go on the Splendor - see John Heald's blog for more info). Well, we're still going on a boat, it's just not what we've been planning over the last nine months or so. Either way, one great part of cruising is all the people who are on the boat to help you have a fabulous experience. And of course it is customary to tip these people who clean the rooms, serve your dinners and make you cool towel animals. So I made a thank you money card!
 I started out with an 8 x 6.75 piece of cardstock and scored it long ways at 3 and 6 inches. The front and back is 3 inches and the inside flap that holds the money is 2 inches. I snapped a little off the length of the inside flap and then rounded the corner.
For decorating the card, I cut up some fun colored paper. On the pink I used silver embossing to stamp the sun image which goes along with the ribbon I got from a cruise pack a few years back. The cap on the front of the card is from a wine cooler bottle. It's such a fun and unique add! Inside the card I used blue embossing to stamp thank you and I plan on writing a little note.
P.S. I will not be tipping $1. That's just ridiculous :) unfortunately, the single was the only bill in my purse!
P.S.S. Later this week I will be giving something cool away to my followers!!!
P.S. I will not be tipping $1. That's just ridiculous :) unfortunately, the single was the only bill in my purse!
P.S.S. Later this week I will be giving something cool away to my followers!!!
Monday, November 22, 2010
CCF Blog Hop Winner
Good morning! Just wanted to post really quickly about the winner of the i-rock. Congrats to TeacherMom!
I will be emailing you and hope to send out the package today. And don't forget...you have to let me know when you use it! :)
I will be emailing you and hope to send out the package today. And don't forget...you have to let me know when you use it! :)
Saturday, November 20, 2010
CCF Give Thanks Blog Hop
 Welcome to the Cricut Card Fairy Blog Hop. This month we are practicing being thankful for all the blessings in our lives. What are you thankful for? Do you stop daily and thank those around you for blessing you? Do you appreciate the small things in life? I sure hope so! With that in mind all of us fairies have put together some awesome THANKSGIVING/THANKFUL themed crafty items.
For my project I created a Thanksgiving card. I started with the rhinestone leaves that I fell in love with at the craft store. I put the rhinestones on some textured green paper and carefully cut around them to get what you see. I then taped some string to the back of them so that the leaves would look like they were falling. I haven't secured the leaves down, so they swing around. Which I think is cool! The background paper is From Recollections Garage Sale line. It has a great image on it that I want to use for another project and I loved this background for this project....I guess what I'm saying is Don't be afraid of cutting up paper and using it!!! For the sentiment at the bottom I embossed it with bronze embossing powder from Martha Stewart.
 Before I get to the blog candy and blog hop list, I wanted to let you know about the Cricut Card Fairy Army. We get regular email requests from people who have friends or family in need of a card. Sometimes it is a sympathy card and other times it's a birthday card! If you are looking to send out some of the great handmade cards you make, contact Crystal to cricutcardfairyarmy@gmail.com.
 Now for my give away! This weekend I will be giving away an i-rock and a pack of glam pearls. There are two conditions: 1) you must leave a comment on this post with a way for me to contact you. 2) if you win, I'd like to hear what you think of the tool (I don't have one...yet!). You do not need to be a follower to win the i-rock...however I will be having another giveaway soon to celebrate and thank my followers. So if you like my blog and giveaways, become a follower!
Now onto the rest of the blog hop where there are opportunities for inspiration, and blog candy. So make sure you hop all the way through, leave comments on every blog, and then a comment on Caitlynsmommy's blog when finished. She is the Cricut Card Fairy Army leader and will be giving away a BNIP Hello Kitty Greetings cart to a person that comments on ALL the blogs!
Happy hopping!
Here is the order in case you get lost along the way.
Caitlynsmommy http://crystalscraftycreations.blogspot.com/
ScrappingDeb http://tidbitsplace.blogspot.com/
AJoy713 <<--YOU ARE HERE
RachelMutchler http://trickut-rachelscrafts.blogspot.com
Kisatrtle http://www.kisatrtleskreativekorner.blogspot.com/
ScrappyJess http://scrappyjess.blogspot.com/
PennyLight http://lightwhimsy.blogspot.com/
KarelJcreations http://karelj.blogspot.com/
Shellie http://shelliescreations.blogspot.com/
GRKIDDO http://ginathorntonstamping.blogspot.com/
JamieFitzgerald http://www.jamieisacraftymomma.blogspot.com/
Iluvsnowmen http://wandaswhimsicalwonders.blogspot.com/
blondemommy26 http://blondemommy26.blogspot.com/
SherylGreene http://sherylscraftingcorner.blogspot.com/
Wednesday, November 17, 2010
CWC Blog Hop Winners
Hello Everyone, THANK YOU ALL for your participation this last weekend in our blog hop. I was really excited to read all of your comments.

 The winner of the Goose File is JustYolie from JustYolie, JustCreate. Please let me know if you would like the cutting file or image file. You can email me at: adrea dot travis dot 2008 @ gmail dot com.

 The winner of the Goose File is JustYolie from JustYolie, JustCreate. Please let me know if you would like the cutting file or image file. You can email me at: adrea dot travis dot 2008 @ gmail dot com.
The winner of the Calender Kit is Kathy from Kathy's-Krafts. I will need your mailing address. You can email me at: adrea dot travis dot 2008 @ gmail dot com.
Just a reminder, I will be participating in another blog hop this weekend. AND after that I will be having a giveaway for my followers. It was going to be to celebrate 50 followers, but we blew that out of the water this last weekend!!!
Sunday, November 14, 2010
CWC Blog Hop - Day 2
Welcome to From The Hills and the CookingWithCricut.com Holiday Blog Hop! If you've come from visiting Gaby at Gaby Creates, you're in the right place! If you've just happened across my blog and would like to play along with our fun hop, you can go to CookingWithCricut.com and start at the beginning. Go HERE.
With the holidays fast approaching we are sharing some wonderful ideas and inspiration for your viewing and crafting pleasure! Each Design Team member will be featuring an original project made especially for this hop. Make sure to check out each DT member's blog. There will be prizes along the way at our DT members' blogs, AND there will be some nice PRIZES with a few different ways to win at CookingWithCricut.com!
 The card I made today features my favorite word of the season, "Joy". The ornament was cut at 3 inches from Winter Frolic. I used gold Stickles on the top for the hanger! I wanted the ornament to look like it was hanging so I put some string onto the card.
The green paper I used was textured, but I wanted something else added to it. So I used Shimmer Spritz and Pop Dots to make the letters stand out. The blue paper in the background is from Paper Source. I had the opportunity to visit one of their stores in Chicago this fall and thought this would be perfect for Christmas projects.

 I have two things I will be giving away this weekend. First is the Christmas Geese Cutting File or Digi File from ScrapbookEden.com. Also up for grabs is a Calendar Kit that contains 999 pieces. If you are ambitious, maybe you can make it a Christmas gift...or you can make it month by month!
All you have to do to win one of these prizes is leave a comment on this post with a way to contact you. For a second chance to win, check out my post from yesterday and leave a comment there!
Now it's your turn! Let’s see your wonderful holiday projects. Be sure to try and include a Cricut or other die cut machine on your project and link it up at CookingWithCricut.com. Next stop...Cathie's blog, Creative Cutter. Go see what she has in store for you today... And when you're done, make sure to head back to CookingWithCricut.com and get entered to win!
Happy Holiday Hopping! Here is the order of the list:
1.CookingWithCricut.com – http://www.cookingwithcricut.com/
2.Abby – http://www.scrapbookaholicbyabby.com/
3.Gaby – http://www.gabycreates.com/
4.Adrea – You Are Here
5.Cathie – http://www.creativecutter.org/
6.Christel – http://www.onescrappinsista.blogspot.com/
7.Kristal – http://www.kandrewdesigns.blogspot.com/
8.Madison – http://www.funkycards.blogspot.com/
9.Kassidy – http://www.inkingitupcrazy.blogspot.com/
10.Jenna – http://jennasfavoritethings.blogspot.com/
11.Valine – http://www.maddstercreations.blogspot.com/
12.Dalis – http://www.stampergirl.com/
13.Brandilynn – http://www.createdbybrandilynn.blogspot.com/
14.Becky - http://www.bouncyflouncyfunfunfun.blogspot.com/
15.Michelle - http://www.mumoftwoblog.blogspot.com/
16.Melinda – http://www.scrapbookeden.blogspot.com/
17.Back to CWC
With the holidays fast approaching we are sharing some wonderful ideas and inspiration for your viewing and crafting pleasure! Each Design Team member will be featuring an original project made especially for this hop. Make sure to check out each DT member's blog. There will be prizes along the way at our DT members' blogs, AND there will be some nice PRIZES with a few different ways to win at CookingWithCricut.com!
 The card I made today features my favorite word of the season, "Joy". The ornament was cut at 3 inches from Winter Frolic. I used gold Stickles on the top for the hanger! I wanted the ornament to look like it was hanging so I put some string onto the card.
The green paper I used was textured, but I wanted something else added to it. So I used Shimmer Spritz and Pop Dots to make the letters stand out. The blue paper in the background is from Paper Source. I had the opportunity to visit one of their stores in Chicago this fall and thought this would be perfect for Christmas projects.
 I have two things I will be giving away this weekend. First is the Christmas Geese Cutting File or Digi File from ScrapbookEden.com. Also up for grabs is a Calendar Kit that contains 999 pieces. If you are ambitious, maybe you can make it a Christmas gift...or you can make it month by month!
All you have to do to win one of these prizes is leave a comment on this post with a way to contact you. For a second chance to win, check out my post from yesterday and leave a comment there!
Now it's your turn! Let’s see your wonderful holiday projects. Be sure to try and include a Cricut or other die cut machine on your project and link it up at CookingWithCricut.com. Next stop...Cathie's blog, Creative Cutter. Go see what she has in store for you today... And when you're done, make sure to head back to CookingWithCricut.com and get entered to win!
Happy Holiday Hopping! Here is the order of the list:
1.CookingWithCricut.com – http://www.cookingwithcricut.com/
2.Abby – http://www.scrapbookaholicbyabby.com/
3.Gaby – http://www.gabycreates.com/
4.Adrea – You Are Here
5.Cathie – http://www.creativecutter.org/
6.Christel – http://www.onescrappinsista.blogspot.com/
7.Kristal – http://www.kandrewdesigns.blogspot.com/
8.Madison – http://www.funkycards.blogspot.com/
9.Kassidy – http://www.inkingitupcrazy.blogspot.com/
10.Jenna – http://jennasfavoritethings.blogspot.com/
11.Valine – http://www.maddstercreations.blogspot.com/
12.Dalis – http://www.stampergirl.com/
13.Brandilynn – http://www.createdbybrandilynn.blogspot.com/
14.Becky - http://www.bouncyflouncyfunfunfun.blogspot.com/
15.Michelle - http://www.mumoftwoblog.blogspot.com/
16.Melinda – http://www.scrapbookeden.blogspot.com/
17.Back to CWC
Saturday, November 13, 2010
CWC Blog Hop - Day 1
 Welcome to From The Hills and the CookingWithCricut.com Holiday Blog Hop! If you've come from visiting Gaby at Gaby Creates, you're in the right place! If you've just happened across my blog and would like to play along with our fun hop, you can go to CookingWithCricut.com and start at the beginning. Go HERE.
With the holidays fast approaching we are sharing some wonderful ideas and inspiration for your viewing and crafting pleasure! Each Design Team member will feature an original project made especially for this hop. Make sure to check out each DT member's blog. There will be prizes along the way at our DT members' blogs, AND there will be some nice PRIZES with a few different ways to win at CookingWithCricut.com!
 For today's post I used the cutting file Christmas Geese from ScrapbookEden.com. I thought it would be a touch of elegance if I used patterned paper. The gray and white paper are scraps from a wedding stack I had. The pink tie and hat are from Stampin' Up. To help the geese stand out I put them on a some squares that sit on a card that opens in the center. The sentiment below is from Pink Cricut's Christmas Wishes. I embossed it with silver embossing powder from Martha Stewart. It looks REALLY good...if you haven't already you should try heat embossing. It's so cool.
 The card itself is from a 8 1/2 by 11 inch paper. I scored it at 2 3/4 inch from each of the sides. It ends up being a really big card...I think it's perfect for adding a great hand written letter to a friend or family member who you haven't talked to in a while. Before adhering the square by gluing only the left side of it, I took a snowflake stamp and stamped red and silver snowflakes on the background. I think it helps bring together the red and silver accents used on the square.
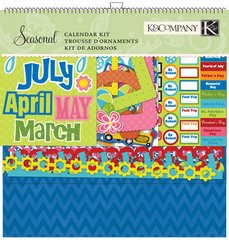 Aren't those geese cute? Wouldn't you love to use them on one of your projects? Well, here is an opportunity to win it! Also up for grabs is a Calendar Kit that contains 999 pieces. If you are ambitious, maybe you can make it a Christmas gift...or you can make it month by month!
 All you have to do to win one of these prizes is leave a comment on this post with a way to contact you. For a second chance to win, come back tomorrow and leave a comment on my second blog hop post! Also, if you like winning things I suggest you become a follower. I have more blog hops coming up and a giveaway planned for my followers!
Now it's your turn! Let’s see your wonderful holiday projects. Be sure to try and include a Cricut or other die cut machine on your project and link it up at CookingWithCricut.com.
Next stop...Cathie's blog, Creative Cutter. Go see what she has in store for you today... And when you're done, make sure to head back to CookingWithCricut.com and get entered to win!
Next stop...Cathie's blog, Creative Cutter. Go see what she has in store for you today... And when you're done, make sure to head back to CookingWithCricut.com and get entered to win!
Happy Holiday Hopping! Here is the order of the list:
1.CookingWithCricut.com – http://www.cookingwithcricut.com/
2.Abby – http://www.scrapbookaholicbyabby.com/2010/11/cooking-with-cricut-holiday-blog-hop.html
3.Gaby – http://www.gabycreates.com/
4.Adrea – You Are Here
5.Cathie – http://www.creativecutter.org/
6.Christel – http://www.onescrappinsista.blogspot.com/
7.Kristal – http://www.kandrewdesigns.blogspot.com/
8.Madison – http://www.funkycards.blogspot.com/
9.Kassidy – http://www.inkingitupcrazy.blogspot.com/
10.Jenna – http://jennasfavoritethings.blogspot.com/
11.Valine – http://www.maddstercreations.blogspot.com/
12.Dalis – http://www.stampergirl.com/
13.Brandilynn – http://www.createdbybrandilynn.blogspot.com/
14.Becky - http://www.bouncyflouncyfunfunfun.blogspot.com/
15.Michelle - http://mumoftwoblog.blogspot.com/2010/11/cooking-with-cricut-blog-hop.html
16.Melinda – http://www.scrapbookeden.blogspot.com/
17.Back to CWC
Wednesday, November 10, 2010
Holiday Baking
 This weeks theme at Cooking With Cricut is baking. You know - holiday cookies, pies and cakes. For my design team entry I decided to bake some Pumpkin Spice Cupcakes with Cinnamon Cream Cheese Frosting. (recipe from All Recipes) My work is having a Chili Cook off & Pumpkin Baking contest this week and I wanted to test out the recipe. (side note, I will probably use more pumpkin next time around)
 The tent that identifies what I baked was cut using SCAL 2.0. First, I brought in the Baking Bear digistamp from ScrapbookingEden.com. I sized it to be 3 inches high, copied the image and then flipped it vertically. I then added a 9x8 inch rectangle and welded the images together. This creates a tent that is 3 inches high, about 10 inches long (including part of the bear image) and 1.5 inches wide. After cutting image I made three score lines at 1.5, 4.5 and 7.5 inches from the top.
 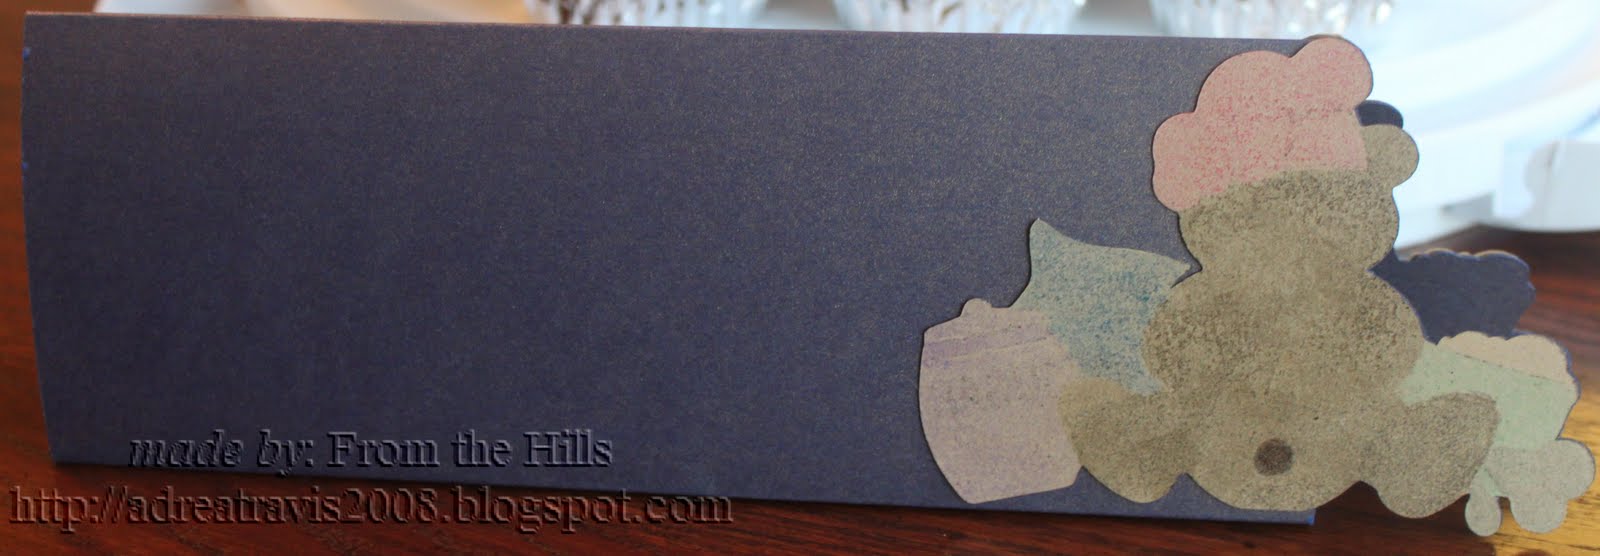 I then took the bear image and cut two of them out of tan paper. Then ran them both through the printer so I would have the digistamp! I made two as a backup in case I didn't like my coloring. But I was pretty happy with how the first one colored, so I colored the back of the other bear. It created a cool front/back of the image! (p.s. did you see his little tail!)
I also printed out the title of the recipe on the tan paper and used a corner punch to create the shape. To finish it off, I used black Viva Decor Glitter-Liner. I wasn't sure how the tent would turn out when I first started this project...but I am VERY happy with it!
 In addition to the tent, I made decorations to go into the cupcakes (is there a name for this?). All three images are from Create a Critter. The apple and pumpkin are cut at 1 1/2 inches and the leaf is cut at 1 3/4 inches. I cut extra sets of the original layer to serve as the backing. This allowed me to hide the toothpick.
I hope I've inspired you to bake along with us this week and participate in the challenge at Cooking With Cricut. Also don't forget the Bloghop we'll be having this weekend...there will be giveaways!
Monday, November 8, 2010
Thank You Card
 Hello everyone! Here is a card that I made for the design team call over at Scrapmaster's Paradise (side note, have you seen that they have a stitching stamp set? that needs to come off my to-get list quickly). They provided a sketch and it needed to include a stamped image. For the flowered background, I rolled Stampin' Ups Fast Flowers wheel stamp. I then used Stampin' Up Markers to color them in. The popped up image, I embossed the flower stems and cut the flowers from the Birthday Cakes cartridge using a white pen for the center. The ribbon starts and finishes on the edge of the thank you stamp. It did require that I cut the ribbon more neatly than usual.
Supplies Used:
- Paper - Stampin' Up
- Flower Stamp - Fast Flowers, Stampin' Up
- Ink - Stampin' Up
- Embossing Powder - Martha Stewart
- Cut Flowers - Birthday Cakes Cartridge
- This coming weekend, Nov 13-14th, I will be participating in the Cooking With Cricut Blog Hop. We'll be celebrating the Holiday Season!
- The following weekend, Nov 19-21st, I will be participating in the Cricut Card Fairy Blog Hop.
- Shortly after I hit 50 followers, I will be having a celebration giveaway. I plan on doing it after the two blog hops. So, become a follower!!!
Wednesday, November 3, 2010
Cooking With Cricut Wk 4
 Hi Everyone! I hope you all enjoyed the sponsored challenge last week. This weeks Cooking With Cricut challenge is Leaves/Fall Foliage/Indian Summer. For my design team contribution, I made a card that uses the same Welcome Fall file from The Cutting Cafe that I used last week! I told you it has a great assortment of fall images and sayings. For tips on how to use their files with your Cricut, check out my new video: http://www.youtube.com/watch?v=NNo7TZjrIUk.
The leaves and the sentiment is from the Welcome Fall file. I didn't adjust the size on any of them...they just cut and printed perfectly the way that they were. If you haven't used their files before, there are some really good resources on their site. Also, I created a short video to show how I used them for this project.

 When I saw how the leaves had the center cut I knew that I wanted to string them on a ribbon. I think next time I would place them a little bit differently, but I really think it worked well.
The squirrel is cut at 3 1/4 inches from the Create a Critter cartridge. I also used the flip feature to get him looking the direction I wanted. The acorns are also from Create a critter. The green background and dark brown cardstock is from DCWV Latte Stack.
Be sure to head over to Cooking with Cricut and participate this weeks challenge. Also, in a few weeks we will be doing a Blog Hop! It will be November 13th and 14th with a Holiday theme and giveaways!
Friday, October 29, 2010
Glue Arts BOO!
 Happy Friday! Glue Arts is going around and BOOING people. Don't know what that is? Check it out here.
And to see their nifty Glue Glider Pro in action on a SPOOKY Halloween project, check out my latest video: http://adreatravis2008.blogspot.com/2010/10/spooky-hanging.html
Also, a little reminder! When I hit 50 followers I will be having a giveaway. So if you aren't already a follower you should become one :)
Tuesday, October 26, 2010
PumpkinCarving
 Happy Wednesday everyone! I'm so excited because this weeks Cooking With Cricut challenge is being sponsored by The Cutting Cafe. The theme is non-Spooky Halloween! Be sure to stop by and participate in the challenge.
I decided to change things up a bit and do a scrapbook page. All of the images are from The Cutting Cafe and the paper is from Graphic 45. One the left hand side are two mats for two 4 x 6 photos and on the right hand side is a spot for journaling. After printing the images and then cutting them out I simply used markers to color them in. On the pumpkin I let the orange dry and then used a thin-point brown marker to draw on faces! I did use pop-dots for the pumpkins, leaves and the arrow.
I loved how easy it was to put together this page based on one file from The Cutting Cafe. If you haven't used their files before, they have plenty of instructions on their website. If you are using the files with your Cricut you will need Make The Cut or Sure Cuts A Lot and a free program called Inkscape. Next week I will have another project that features images from The Cutting Cafe and here are a few links of past projects: Halloween Candy Box, Spooky Hanging, School Cards.
Monday, October 25, 2010
Halloween Candy Box


Hello! I have been having a lot of fun this year with Halloween crafts. I got the cool idea of this candy box from a YouTube Video (http://www.youtube.com/watch?v=8evnkev6k8). It is a Christmas candy box that has 7 nuggets in it. I wanted to create a similar project, but scaled down to only 3 nuggets. It took measuring twice and cutting once, but I got it down! I think this is a fun project that could easily be done for friends at a party or coworkers or if your REALLY ambitious for the neighborhood kids! Here's my video on how I created the box. To prevent misstating the measurements I didn't include them in the video. But you can see them below the clip. Also, if you want to do a box for 7 nuggets the video linked above includes the measurements.
Supplies Used:
- Paper - all of it is from The Paper Studio
- Tags - cut from Accent Essentials cartridge
- Ghost Image - from The Cutting Cafe
- Sentiment - I created using the font "Creepy"
Measurements & Scoring for a box that fits 3 nuggets:
- For the main box, cut the paper at 5 1/2 x 4 inches. Score at 5/8 and 1 1/4 inch on the short sides. Score at 3 3/8 and 1 1/4 inch on the long sides.
- For the slider top, cut the paper at 5 1/4 x 3 inches. Score at 1 1/4 and 1 7/8 inch on the long side only. You may want to adjust the scoring a touch based on the thickness of the papers that you are using.
- For the candy wrappers, cut the paper at 3 x 1 inches.
Saturday, October 23, 2010
Spooky Hanging
 This was such a fun project to do! I think I got the idea from one of the recent blog hops I've visited. (The Creative Stampers Spot)
Here are some pictures and a video!

One of the things I didn't mention in the video is how I made the ribbon finish. Instead of it just hanging down I put some glue on the end of the ribbon and then curled it up into a roll. You could do this on the top as well depending how you hang it.


MPS Live Challenge
 First of all I have to thank Purple Scrapbooker and My Pink Stamper. I won a MPS stamp set from Purple Scrapbooker and received it very quickly and I'm very excited to have Punny-licious. Although after last nights u-cast I feel a little behind as she announced her third set in the Punny-licious series! During the MPS live u-cast her and Karlee gave us a challenge. Use the colors pink, purple and green to create something in 30 minutes or less. Now, i do have to admit I didn't complete my project in 30 minutes as my flocking needed to dry!
 I decided to use Create a Critter and make an animal that I hadn't used before. I decided to use the whale to go along with the Punny-licious stamp "Get Whale Soon!". The background image is from Digital Delights. I flocked the seaweed to bring in the green; it wasn't easy to keep the glue in the lines but it turned out cute. I cute the whale at 2 1/4" with two layers of purple and the top in an awesome pink color. I then sprayed all of it with my Shimmer Spritz and used pop dots to place it. I don't remember how big the starfish was cut at...but I left the little circles in and just colored it instead. To finish off the card I used the MPS stamp in silver! Simple, easy and quick!
If you've just stopped by, I'll be posting a video shortly and will have a giveaway when I hit 50 followers! See previous posts for more details!
Friday, October 22, 2010
Quick Update
Hello Everyone and HAPPY FRIDAY!!!!
I just wanted to post a quick update about a few things I have coming up.
I just wanted to post a quick update about a few things I have coming up.
- Tomorrow I will be posting another video! It's a cool non-card project and for all of you cat fans there is some bonus footage of my cat Abbey in it :)
- The project involves files from The Cutting Cafe and I will be posting another card that features The Cutting Cafe files on Wednesday as a part of a sponsored Cooking With Cricut challenge. I plan to feature how to easily cut these files with SCAL 2. If you haven't already you really should check them out...Regina does a GREAT job of sending out the files shortly after you place the order. (p.s. check out my most recent card using The Cutting Cafe files Back to Fall)
- I have two blog hops scheduled for November. So keep an eye out for those.
- I currently have 40 followers...I'm considering doing a giveaway when I hit 50. I'm keeping my eye open for a cool prize - let me know if you have a suggestion!
Thanks for being a follower I really appreciate the comments and support.
Wednesday, October 20, 2010
Pick Me!
 If have come here from Cooking with Cricut to see my second Designer Team contribution...WELCOME! If you are one of my regular followers, you should head over to Cooking with Cricut to see this weeks challenge!
For this challenge I used Pumpkin Man, you can get the files from scrapbookeden.com. I used SCAL to add the words to the sign and cut out the file using my Cricut. I put the Cricut Man on two ovals and started the decorating. The googly eyes look really cool! I then added some eyelashes to turn Pumpkin man into a Pumpkin woman!
The base of the card is the other side of a scalloped cut. I strung some embroidery string around it and added some foam leafs that I just picked up from Hobby Lobby!
p.s. Did you notice her purple shoes? They remind me of some of the Reebok's that were around when I was younger!
Subscribe to:
Posts (Atom)


