Pages

Saturday, July 31, 2010

Crafting for a Good Cause

Recently I've slowed down on making cards for different challenges because I didn't have an occasion to use as my inspiration. Well, I've joined a great cause that will give me some regular inspiration. The Cricut Card Fairies are a great group of crafters from around the world who send cards in need of a smile. They send out cards for special events, as a pick me up, sympathy or just because. They send out "missions" three days a week, so I should have plenty of card making inspiration. If you are a card maker and interested in becoming a Cricut Card Fairy, hop onto the Cricut Message board specifically for the group.

This is the first card I have made specifically to send as a Cricut Card Fairy. I hope the flowers and bright colors will bring cheer in someones life.

Supplies Used:
Plain Paper - scraps
Patterned Paper - Paper Trey Ink
Stamps and Embossing Powder - Martha Stewart

Thanks for looking!

Tuesday, July 27, 2010

Baby Shower Projects

My friends baby shower was this weekend and I was in charge of the games. We played the rice game, remember the items in the basket and we drew a name out of the envelopes that will be used for the Thank You cards.

I had already made the Invites (see previous posts), but I wasn't going to stop there! Here are the other projects I made!


The easiest thing I made was this decoration for the rice game. I cut the safety pin from a standard image in SCAL using plain paper. I then give it a shimmer using Stampin' Up's Vanilla Shimmer Smooch Spritz. The spritz is SO cool! I added a few safety pins to the ribbon which went around the vase that held the rice.
In the rice there were 10 actual safety pins. The premise of the game is to see how many safety pins you can dig out of the rice in one minute; surprisingly challenging!


My thank you cards were inspired by a RAQ challenge on the Cricut Card message board. The cute little onesie is from the New Arivals cartridge. I used the Stampin' Up Soft Suede Marker to edge the onesie and add the three little dots on the bottom of the onesie and next to the lower-right hand corner of the plaid paper. It was also the color used for the little birdie on the front :) which is from the Bouquet Bunch stamp set. The flower brads and paper came from Paper Studio.


This is the card that I made for the mom-to-be. I cut the various levels of the buggy from the New Arrivals cartridge with a few snips from my scissors. I created the baby blocks in SCAL and this card was all made with scraps!


Clothes dividers for the babies closet. I will be posting a video about this project shortly.


This framed scrapbook page has to be my favorite project! I did everything from creating the page to painting the frame. I got to start as soon as I found out what the colors of the babies room would be, purple and green.
I can't recall where I got all of the supplies for this project from. But I'm so happy with how it turned out!

Like I mentioned, I've been working on some of these projects for some time...which answers the question of Where do I find the time? Thank you for stopping by, I had a blast with these projects!


Tuesday, July 20, 2010

My First Video

All right, here it is. This is the first video that I have created. I used my new camera to shoot the full HD video! I learned a lot about creating a video and then editing it. I have already planned out my next video. I hope to have that up next week.

The card I am creating in the video is the Baby Shower Invite card. (original post)


Tuesday, July 13, 2010

It's My Birthday

Happy birthday to ME! I have been planning on creating a fun card for my birthday and I think I accomplished that! My original idea was just to have a stamped or die-cut noise maker put on a card. But I just couldn't find the perfect item so I thought of a different way to get a noise maker on my card.
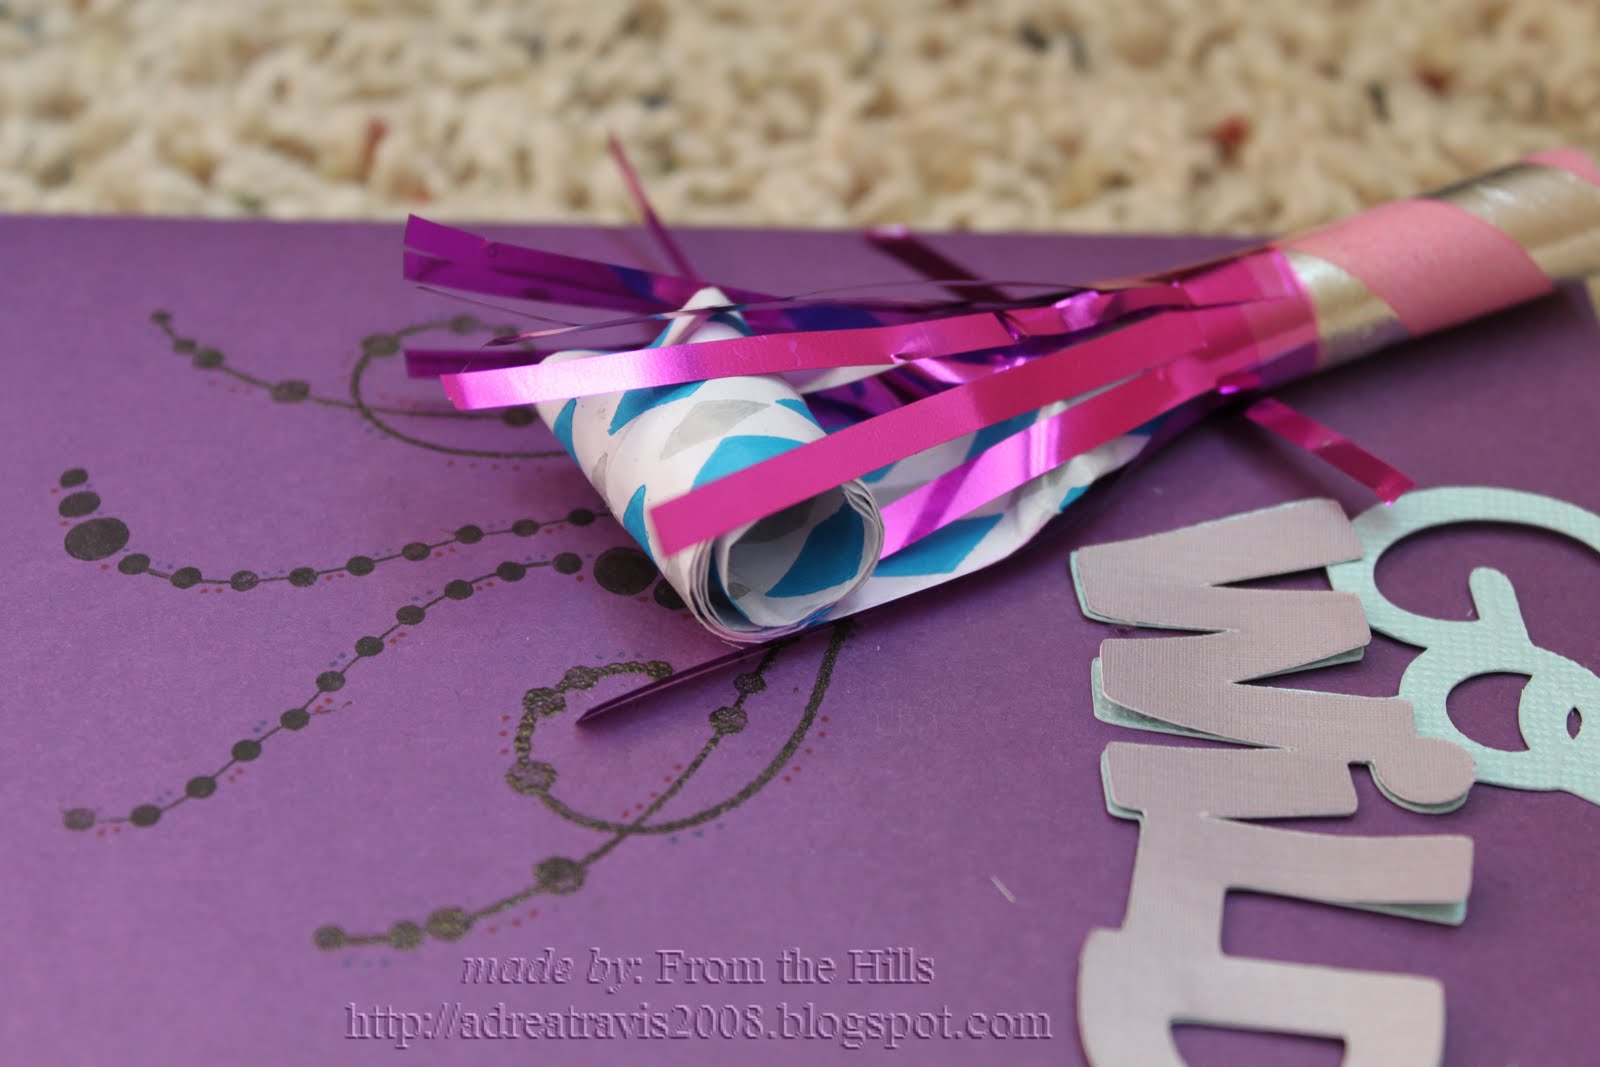
A while back I participated in a challenge where you used non-crafting items on your project. Since then I have seen common items in a different way. So, obviously I decided that putting an actual noise maker on my card would be the only thing to do! I picked up a bag of noise makers from WalMart, about 8 for $1, gotta love cheap! I stamped the swirly dots in black ink. I also used my new heat embosser on the two outside swirls. To add some more color and pop I also used my new Stampin' Up markers to create some dots along the swirls.


The phrase "Go Wild" comes from my new cartridge, Create-a-Critter. I was flipping through the guide looking for the Happy Birthday phrase, but when I came across "Go Wild" I stopped.

Overall, this is a fun card and I got to use new tools and techniques.

Thank you for reading my blog. It's all I could ask for on my special day!

Sunday, July 4, 2010

Sketchy Challenge

The Challenge: Create pages based on the double-page layout.
The Challenger: Sketchy Thursdays


I have given myself quite a few personal goals lately. One of them is to complete the scrapbooking of my wedding before I complete the first two years of marriage. I don't have much time left...but at the same time I don't have much more that I want to scrapbook.I used the sketch from this weeks Sketchy Thursdays challenge as inspiration for my layout. I think you can still tell where my inspiration came from, even though my pages are very simple. Thank you for stopping by!